Get Started
Learn about the SiteAssist Developer API and how to create API keys
Introduction
The SiteAssist Developer API provides programmatic access to integrate AI-powered chat assistants into your applications. The API allows you to embed intelligent chatbots on your websites and services, enabling seamless customer interactions powered by AI.
With the Developer API, you can:
- Initialize visitor sessions for chat interactions
- Create and manage conversations
- Send and receive messages with AI assistants
- Access conversation history
- Perform semantic search on your knowledge base
- Retrieve Q&A entries from your project
- Generate chat completions using configured assistants
To use developer API, you need to create API keys in the project dashboard.
Creating API Keys
Follow these steps to create API keys for your project:
Step 1: Navigate to API Keys Dashboard
- Go to your project dashboard in SiteAssist
- In the sidebar under Advanced, click on API Keys
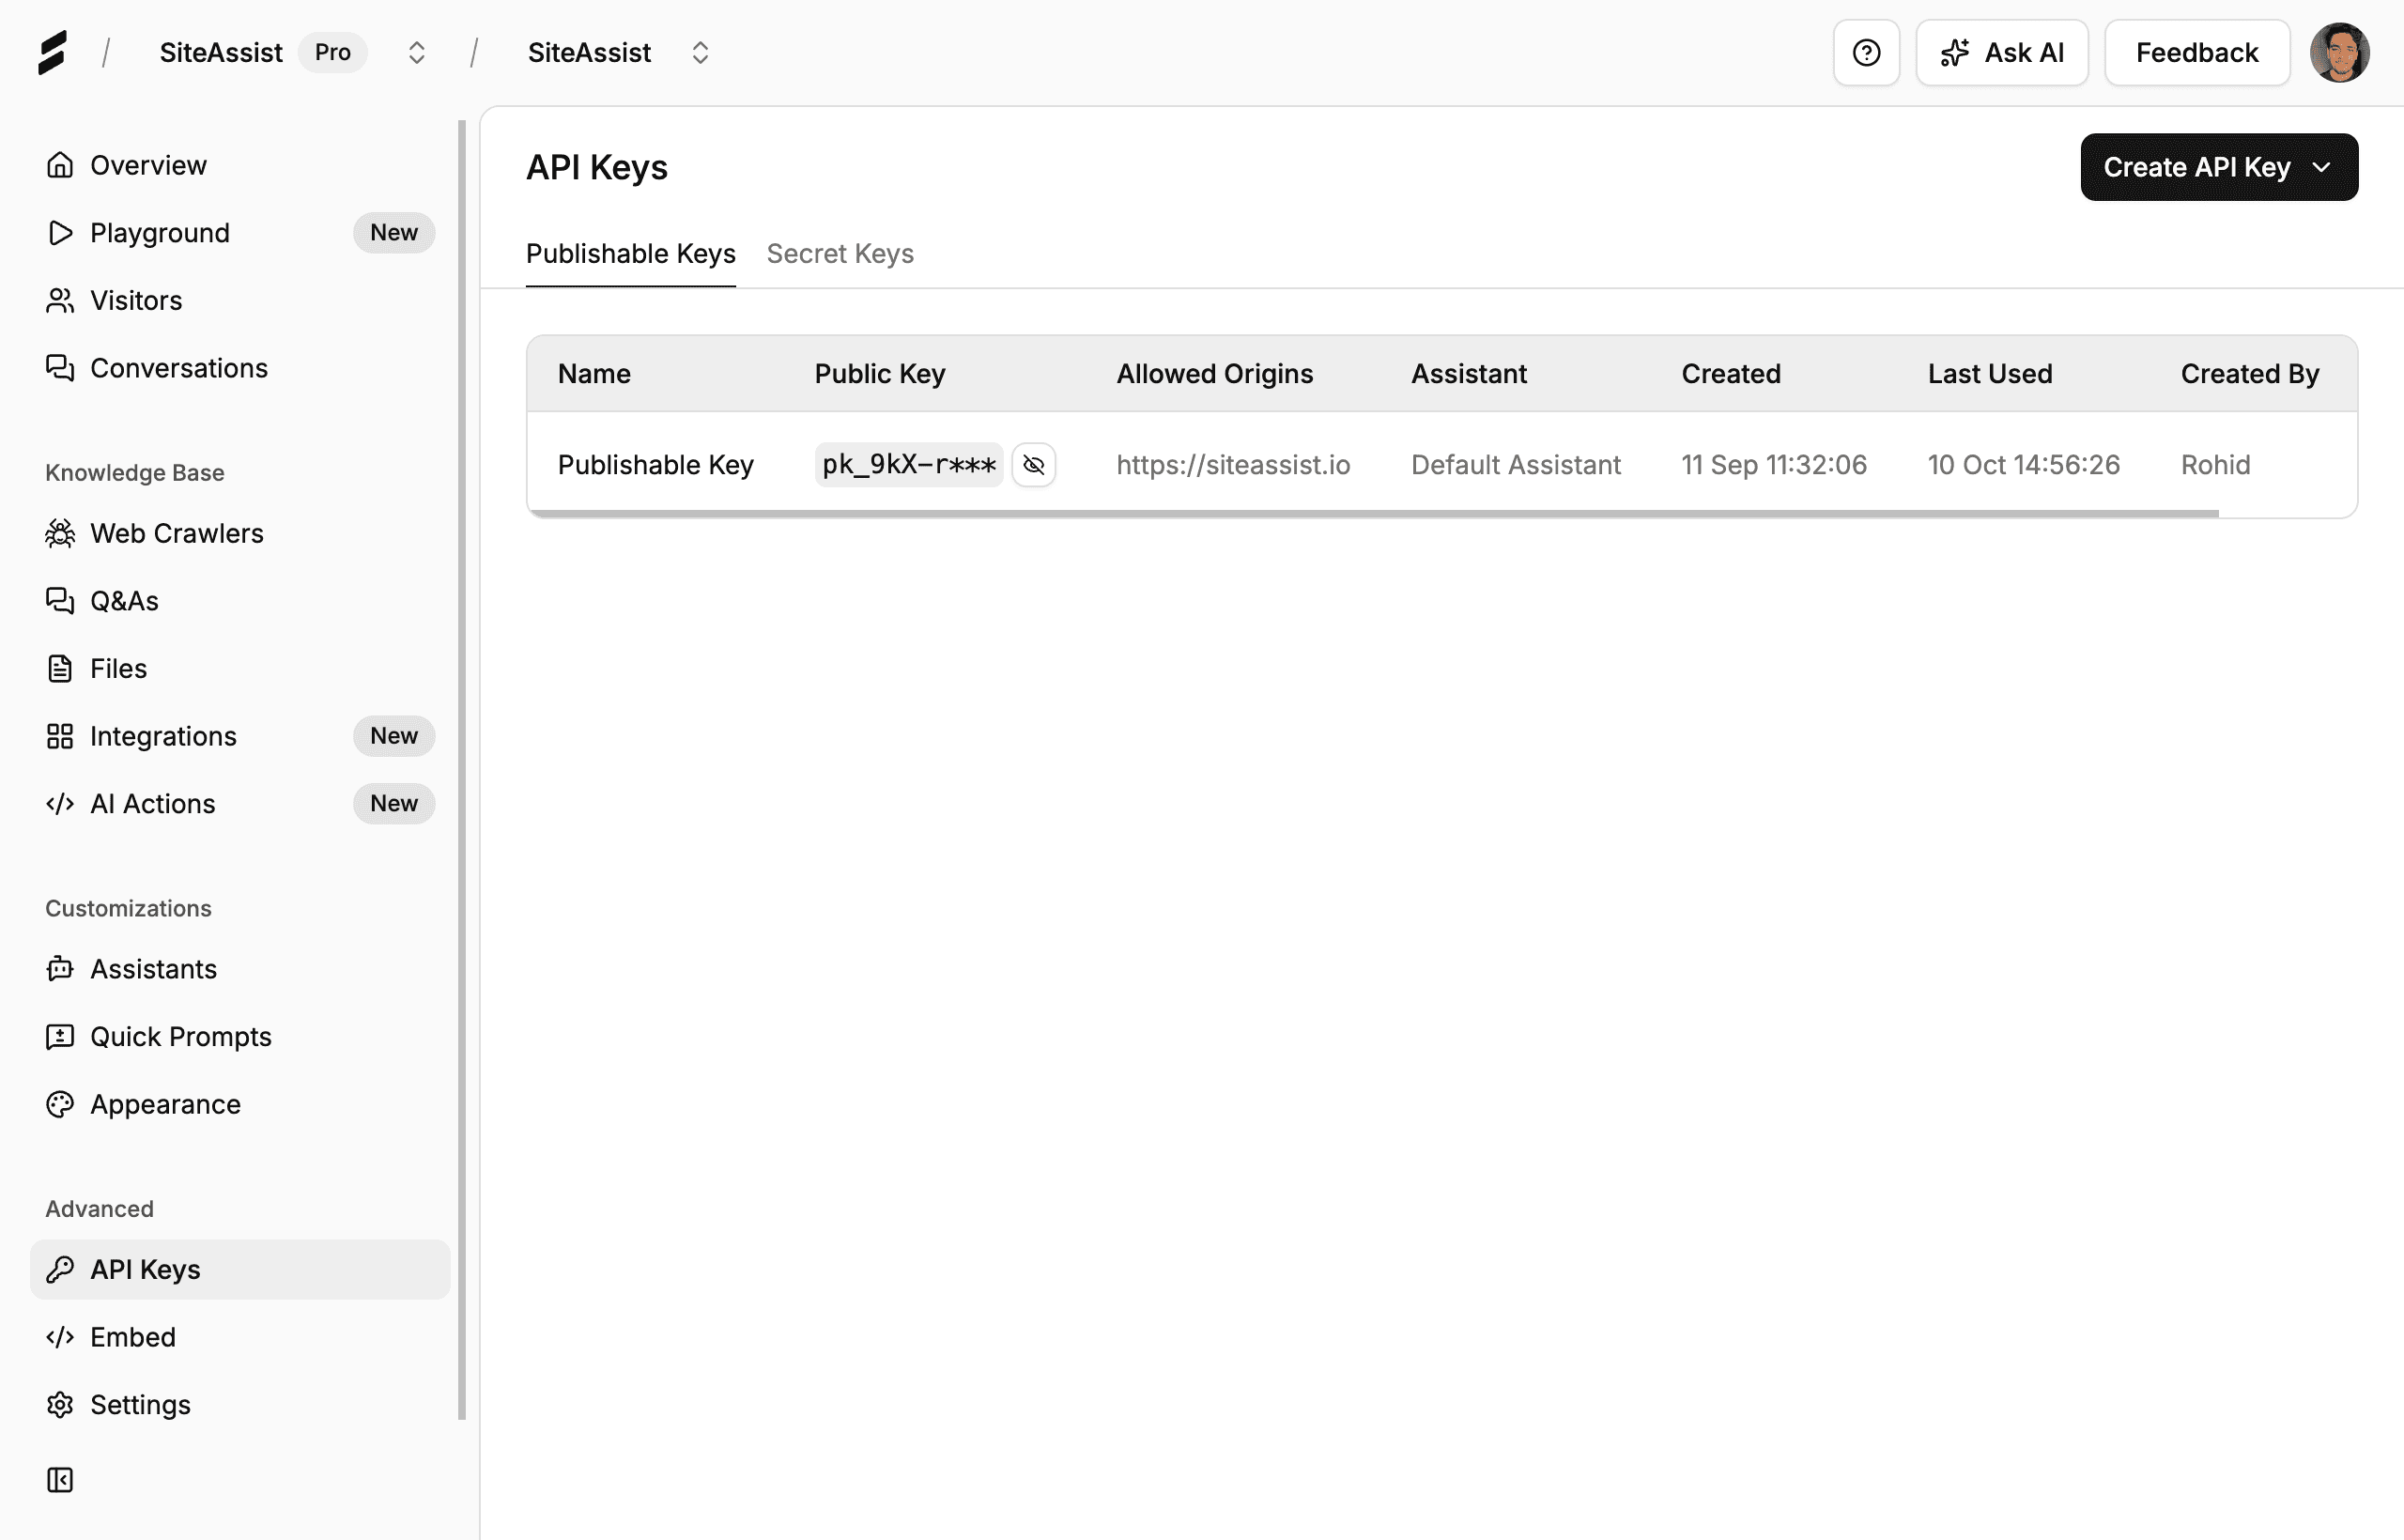
Step 2: Click Create API Key
In the top-right corner of the API Keys dashboard, click the Create API Key button. This will open a dropdown menu with two options:
- Publishable Key - For client-side applications
- Private Key - For server-side applications
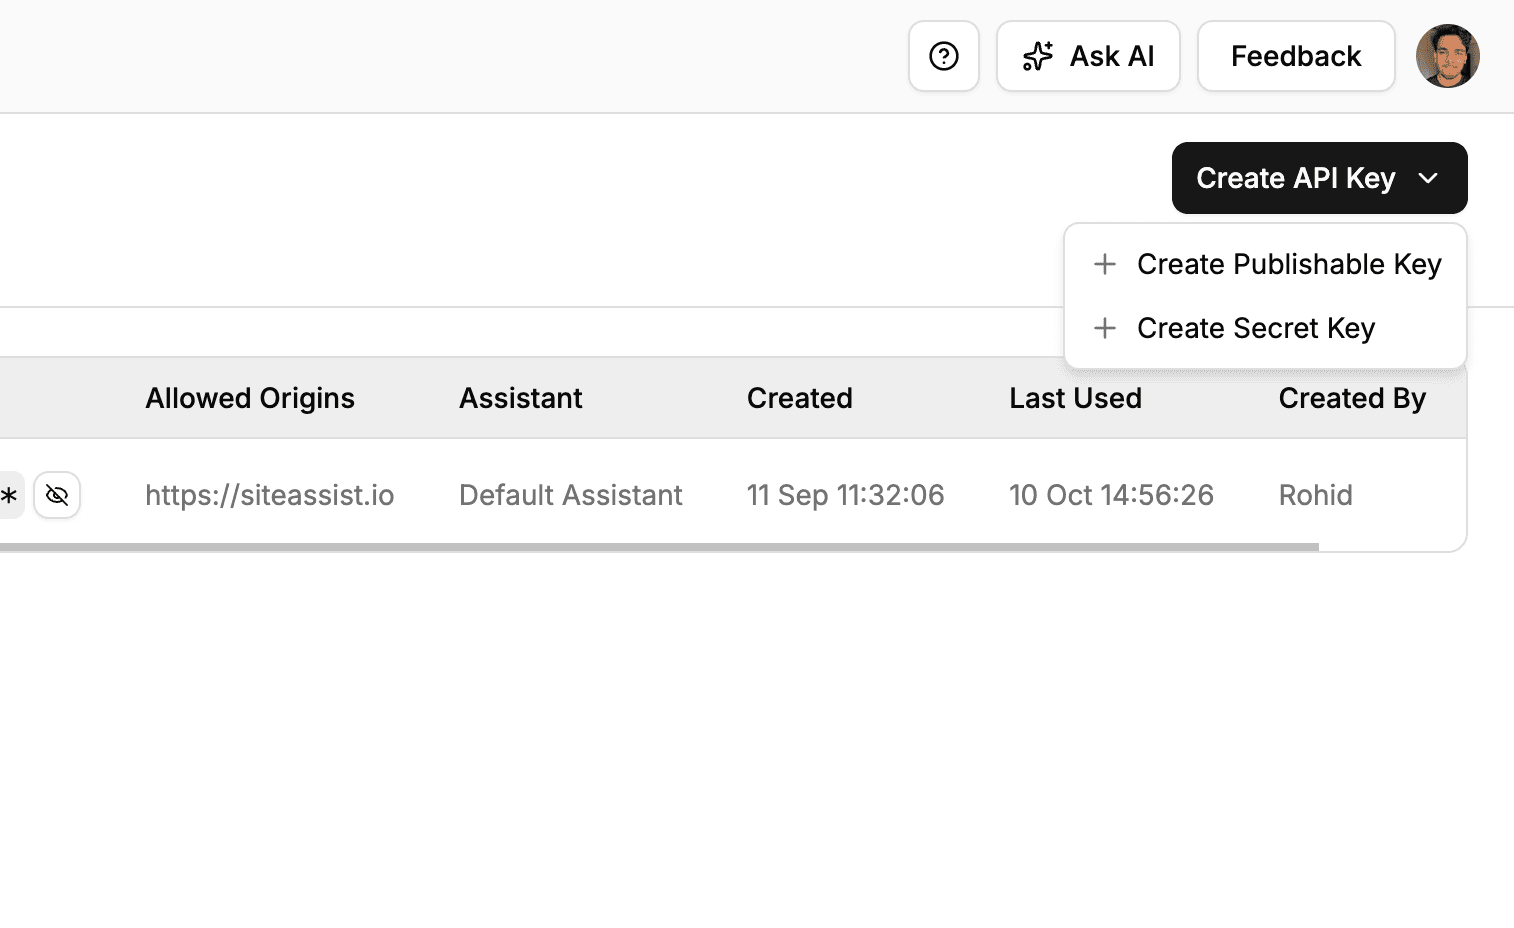
Step 3: Choose Your Key Type
Select the appropriate key type based on where you'll use it:
Publishable Key
For client-side applications (websites, mobile apps):
-
Select Publishable Key from the dropdown
-
Fill in the modal fields:
- Name: Give your key a descriptive name (e.g., "Production Website", "Mobile App")
- Assistant: Select which AI assistant this key will interact with
- Allowed Websites: Add the domains where this key will be used (e.g., "https://example.com")
-
Click + Add URL to add multiple allowed domains
-
Click Create Key
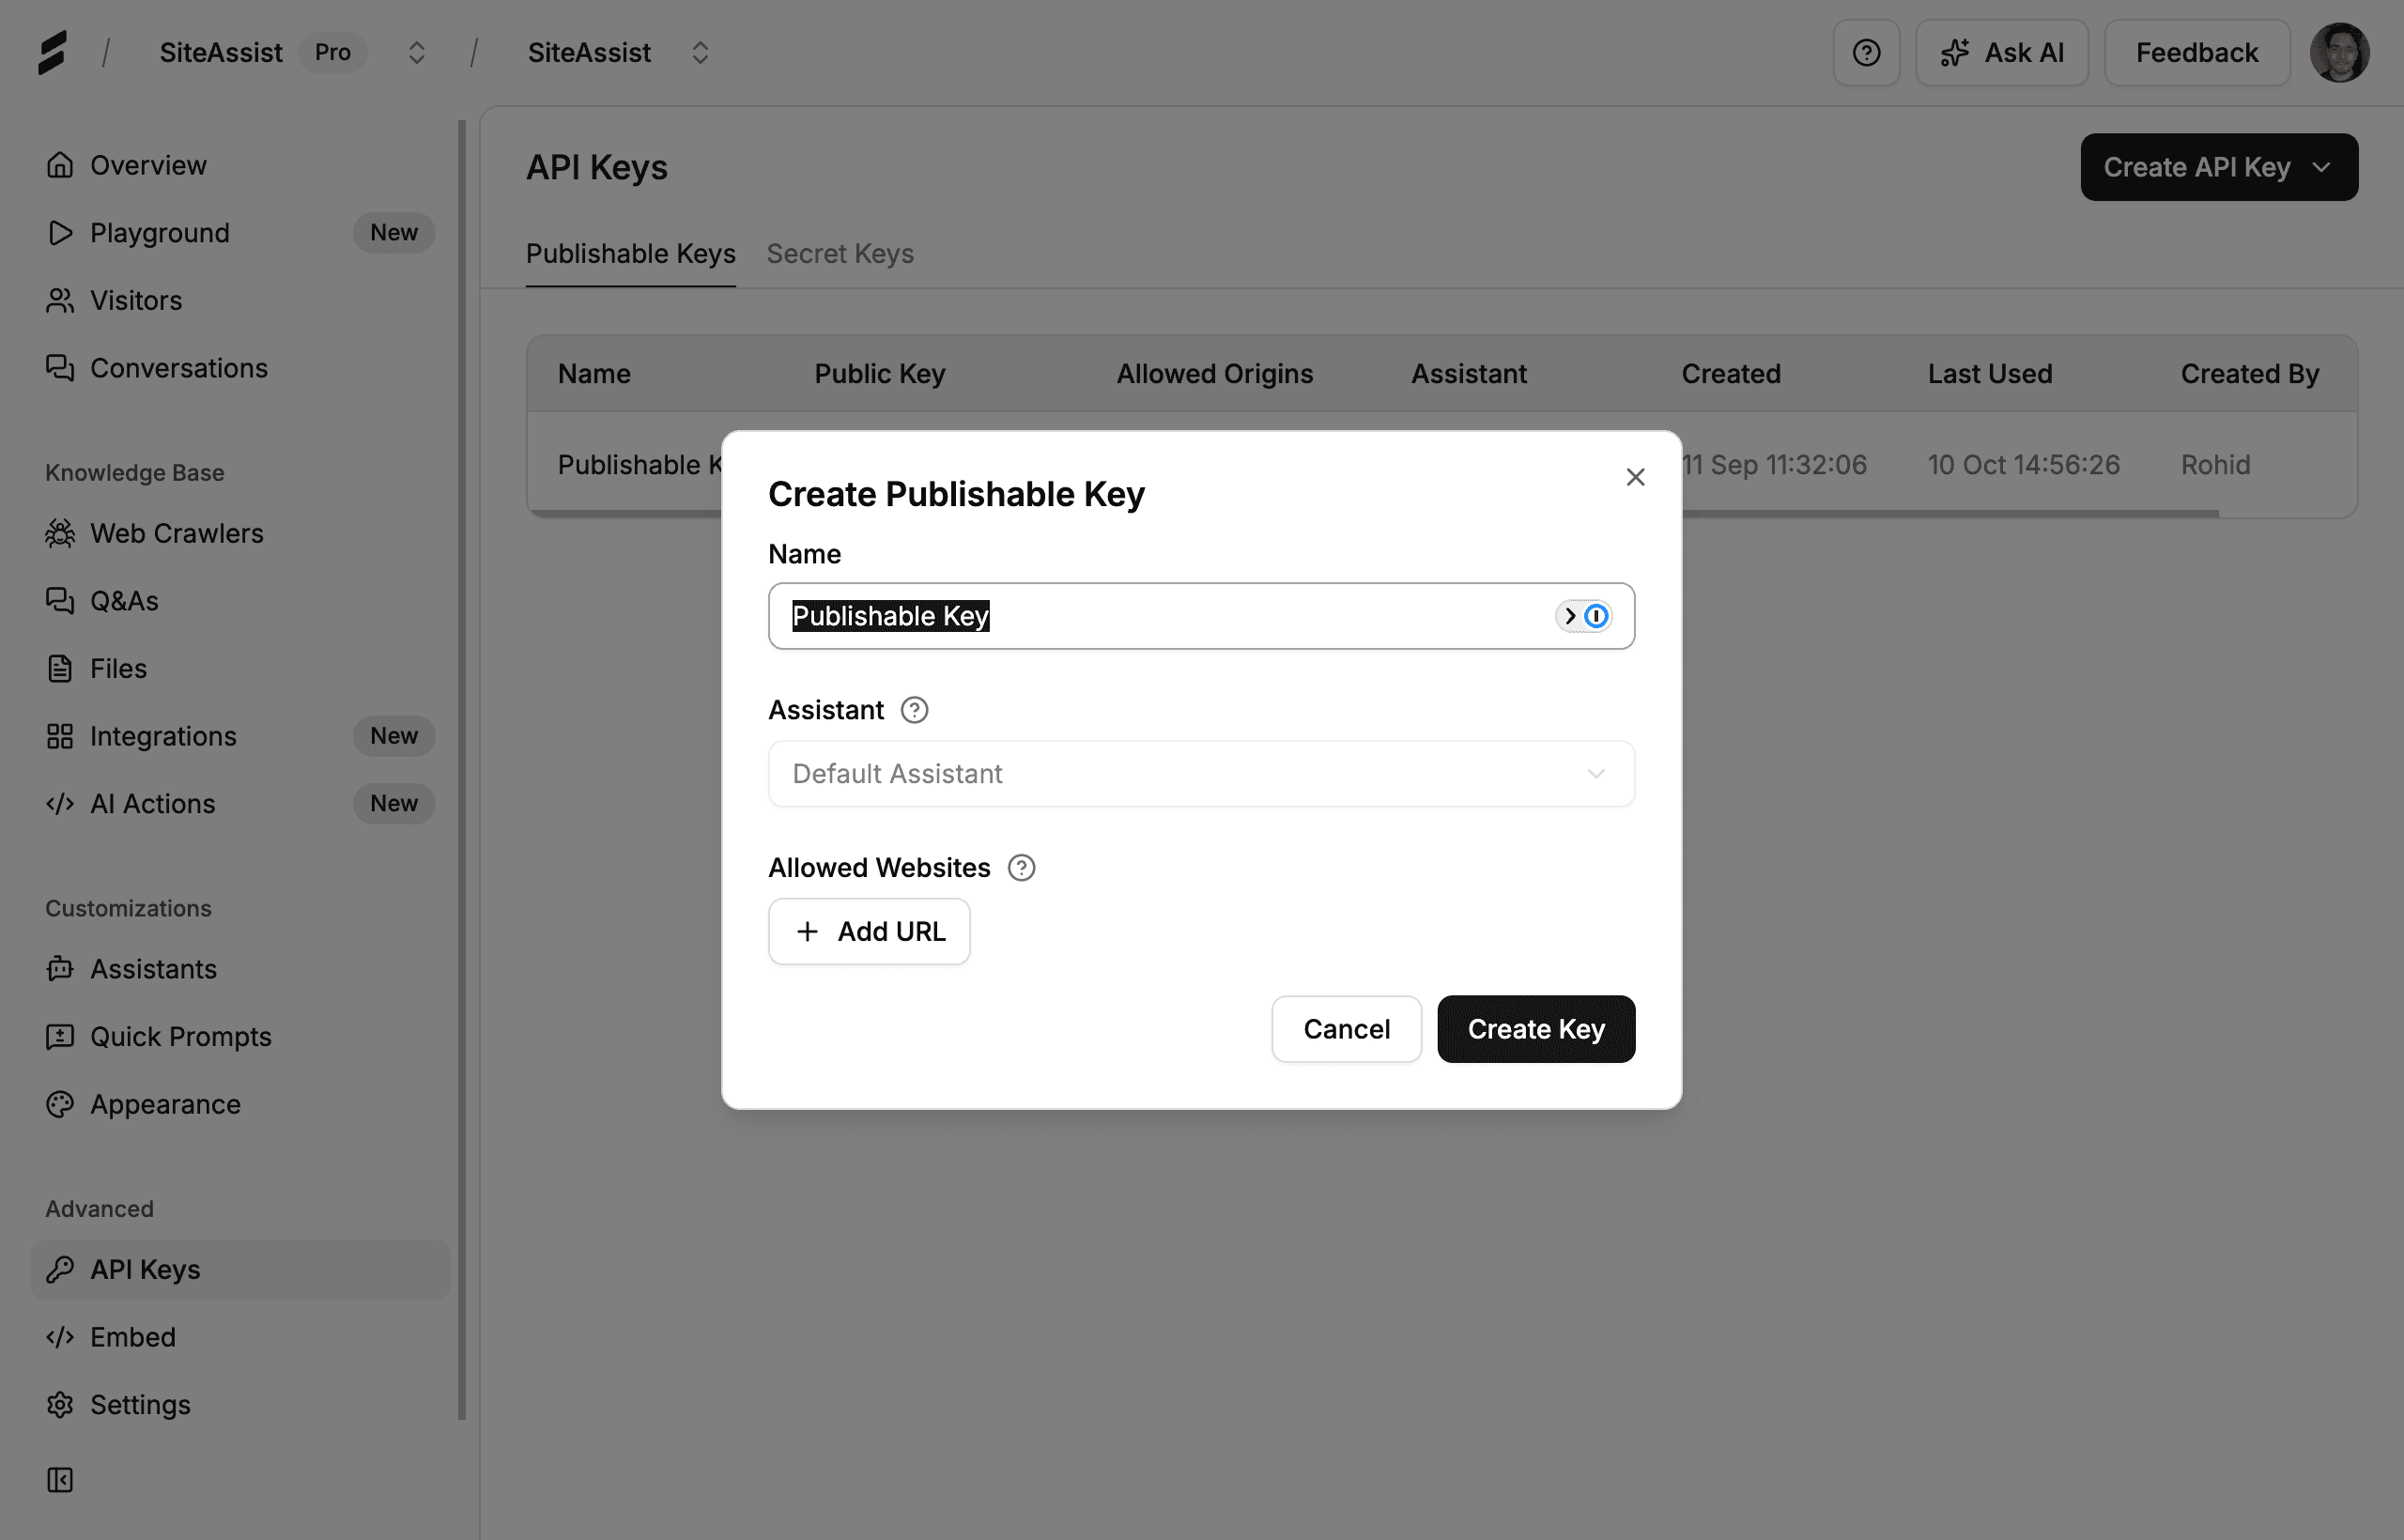
Domain Restrictions: Adding allowed websites helps protect your API key from being used on unauthorized domains. The API will reject requests from domains not in your allowed list.
Private Key
For server-side integrations:
-
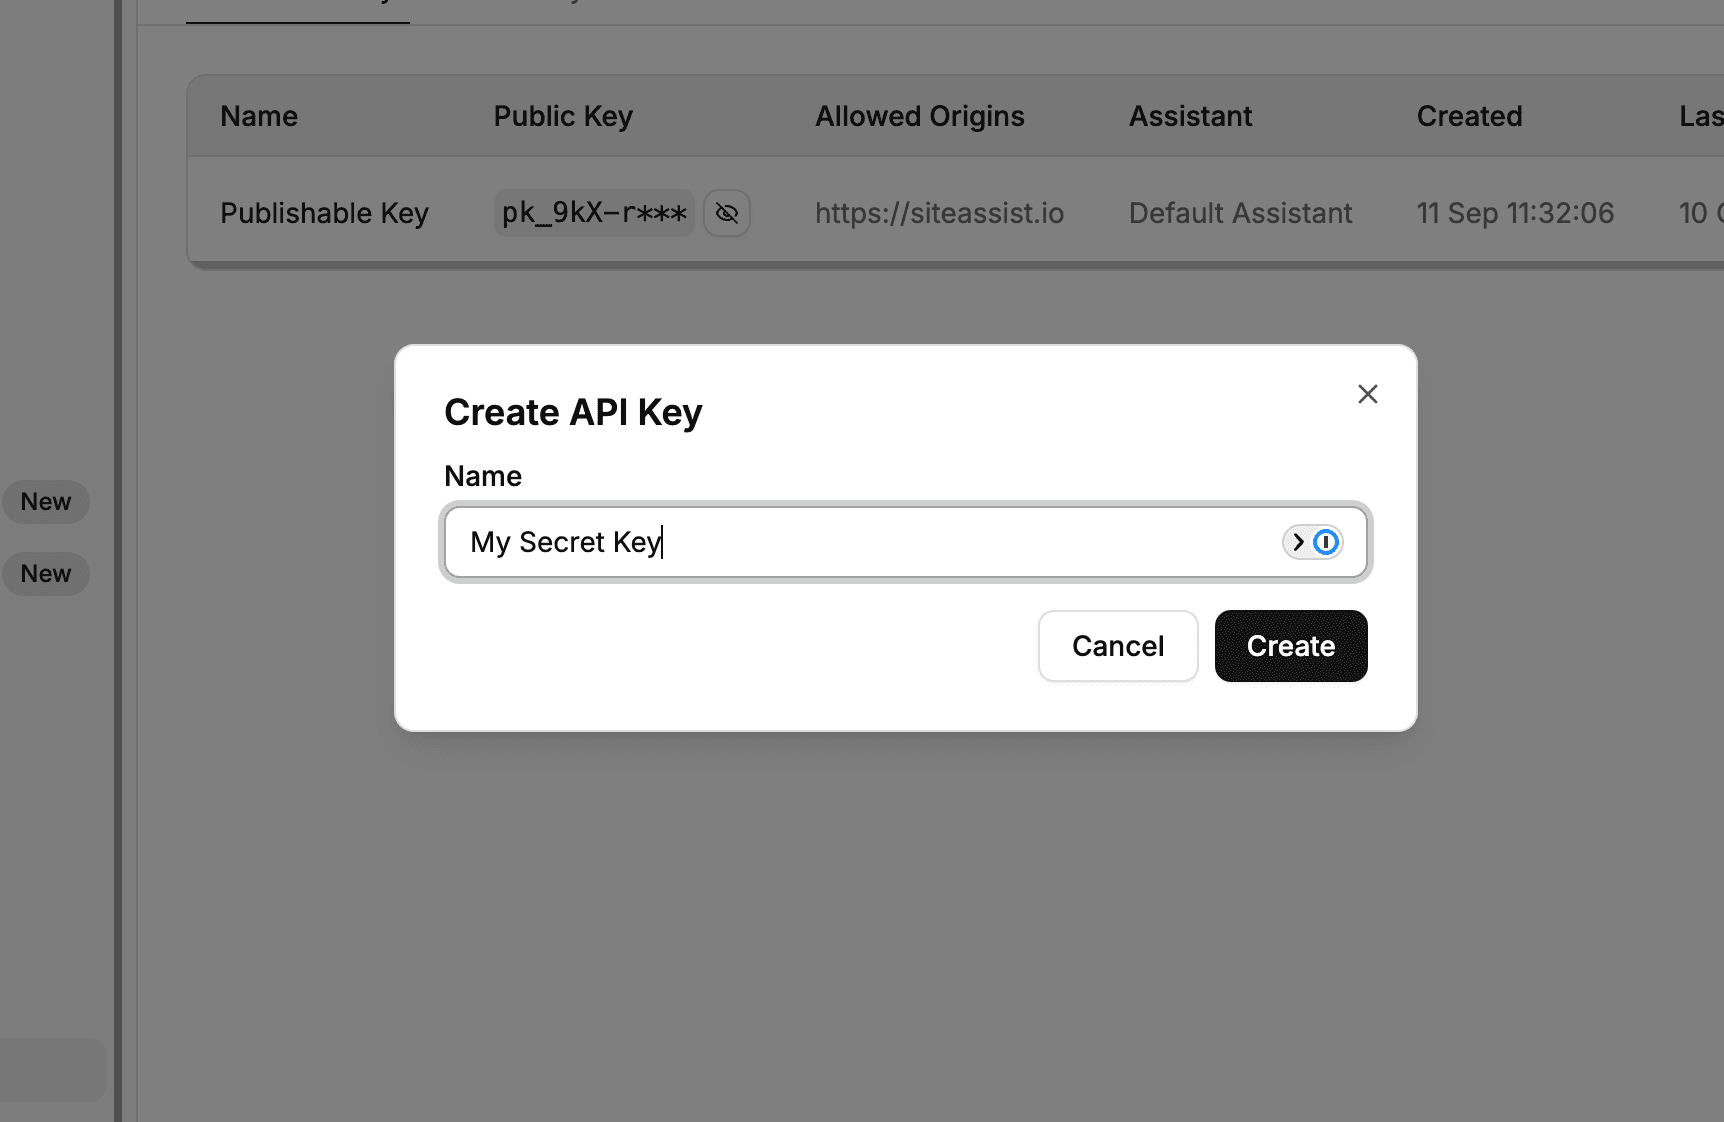
Select Private Key from the dropdown
-
Enter only:
- Name: Give your key a descriptive name (e.g., "Backend API Integration", "Analytics Service")
-
Click Create
-
Save Your API Key
After creating your key, a modal will display your new API key.
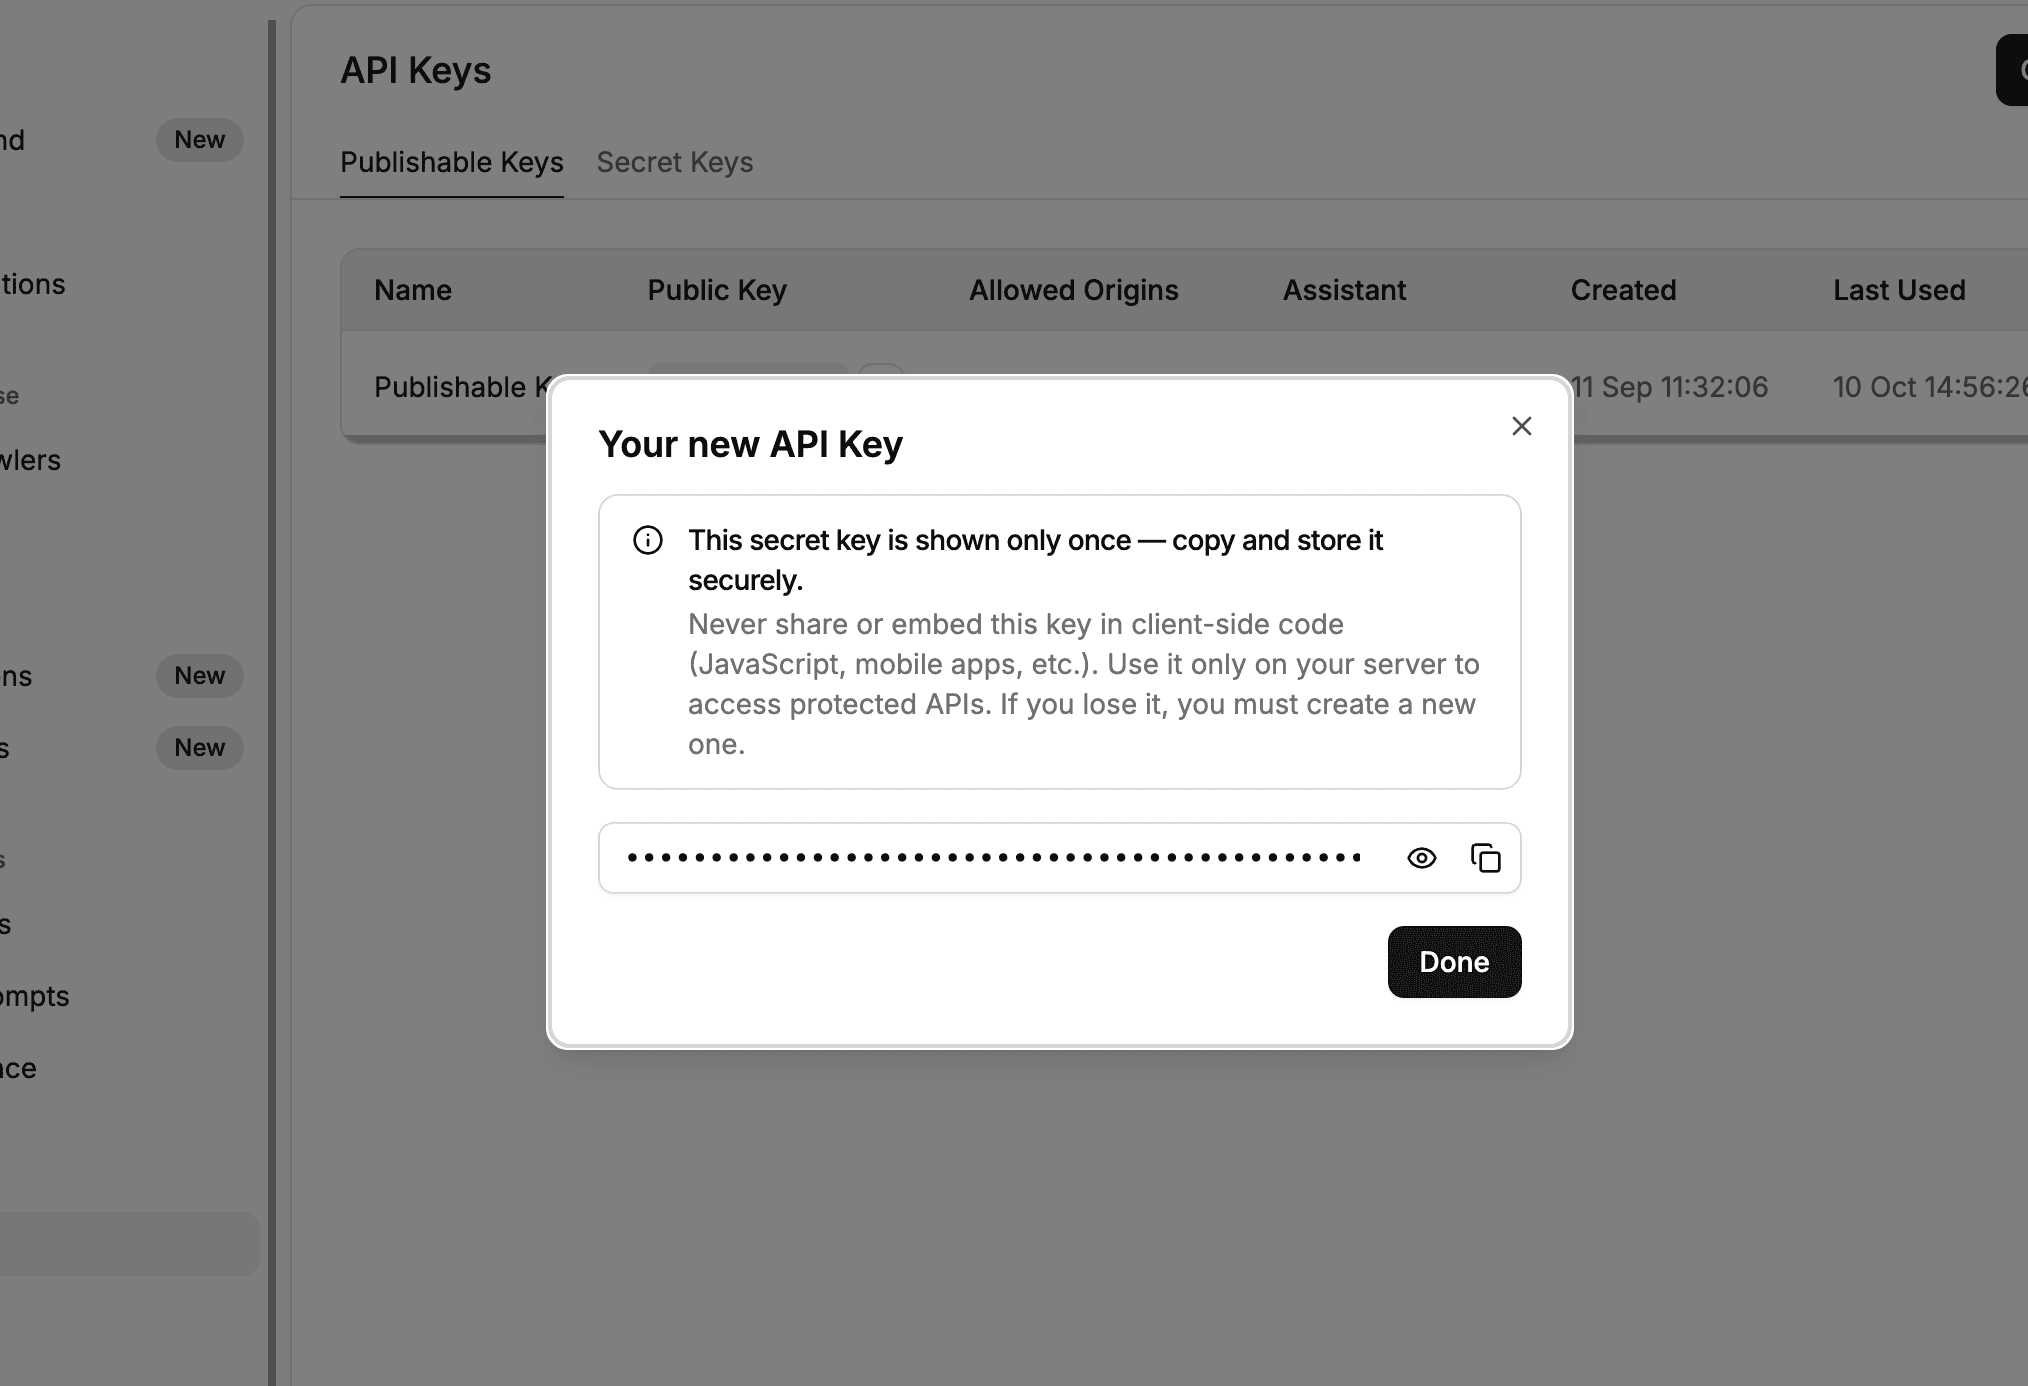
Important Security Notice
This is the only time your API key will be shown in full. Make sure to:
- Copy the key immediately and store it securely
- Never commit it to version control
- Use environment variables to store it in your applications
- If you lose it, you'll need to create a new one
For private keys, if the key is ever exposed, revoke it immediately and create a replacement.
Revoking API Keys
If an API key is compromised or no longer needed:
- Locate the key in the API Keys dashboard
- Click the actions menu (⋯) for that key
- Select Revoke Key
- Confirm the action
Revoking a key will immediately stop all applications using that key from accessing the API. Make sure to update your applications with a new key before revoking if continuity is required.
Need Help?
We're here to help you succeed! Whether you have questions, need assistance with setup, or want to discuss advanced use cases, our team is ready to provide personalized support.
Contact us: support@siteassist.io
We'd love to hear about your use case and help you get the most out of SiteAssist!