Quick Start
Create your first AI-powered assistant with SiteAssist
This quickstart guide shows you how to set up your first AI-powered assistant with SiteAssist.
After completing this guide, you will have an intelligent assistant live on your website, ready to provide personalized help and engage with your visitors.
Get Started
After you complete the authentication process and onboarding (which includes creating your first workspace and project), you're ready to set up your AI assistant.
Haven't signed up yet? Create your free SiteAssist account to get started.
Set Up Your Crawler
A crawler is like a smart robot that reads your website to understand what it's about. This helps your AI assistant learn your content so it can answer visitors' questions accurately.
Don't worry if this seems technical - the screenshots below will guide you through each step!
-
Navigate to the
Web Crawlerstab from the sidebar. -
Click on Add Crawler to set up a new web crawler.
-
Configure your crawler:
- Name: Give your crawler a descriptive name (e.g., "My Company Website")
- Start URL: Enter your website's main URL (e.g.,
yourwebsite.com) - Preset: Choose the type that best matches your site:
- Website - Perfect for most business websites
- Documentation - For help docs or technical sites
- Blog - For news, blog, or article-focused sites
- E-commerce - For online stores (coming soon)
-
Click Create & Start Indexing to start the crawling process.
This process usually takes 2-5 minutes depending on your website size. You'll see a progress indicator and logs showing the crawler is working.

Need more control? For advanced crawler settings like URL exclusion rules, frequency scheduling, and URL limits, see our detailed Crawler Configuration Guide.
The crawler will automatically discover and index your website content (think of this like creating a smart library catalog of all your pages). Once complete, your AI assistant will understand your website's content and be ready to help visitors.
Embed Your Assistant
Now it's time to add your AI assistant to your website! This is easier than it might sound.
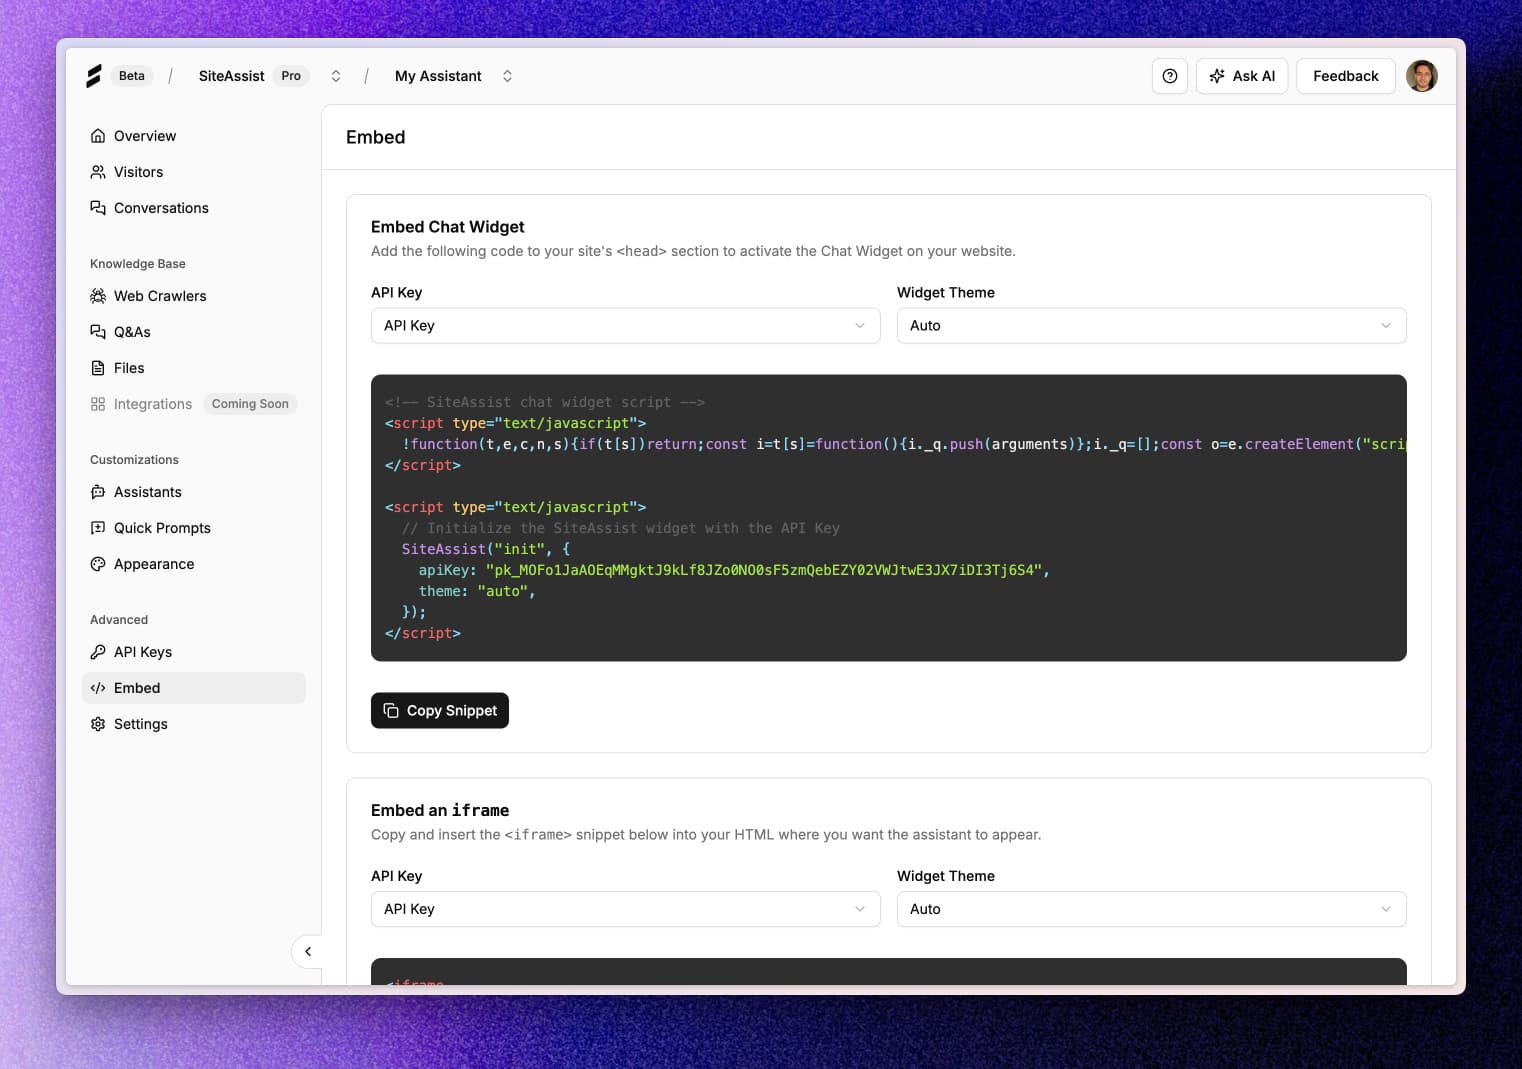
- Go to Advanced → Embed in the sidebar.

- In the Embed Chat Widget card:
- API Key: Select your publishable key from the dropdown (this is like a secure password that connects your website to SiteAssist)
- Widget Theme: Choose your preferred appearance (auto/light/dark)
- Click Copy Snippet to copy the HTML script tag
Adding the Code to Your Website
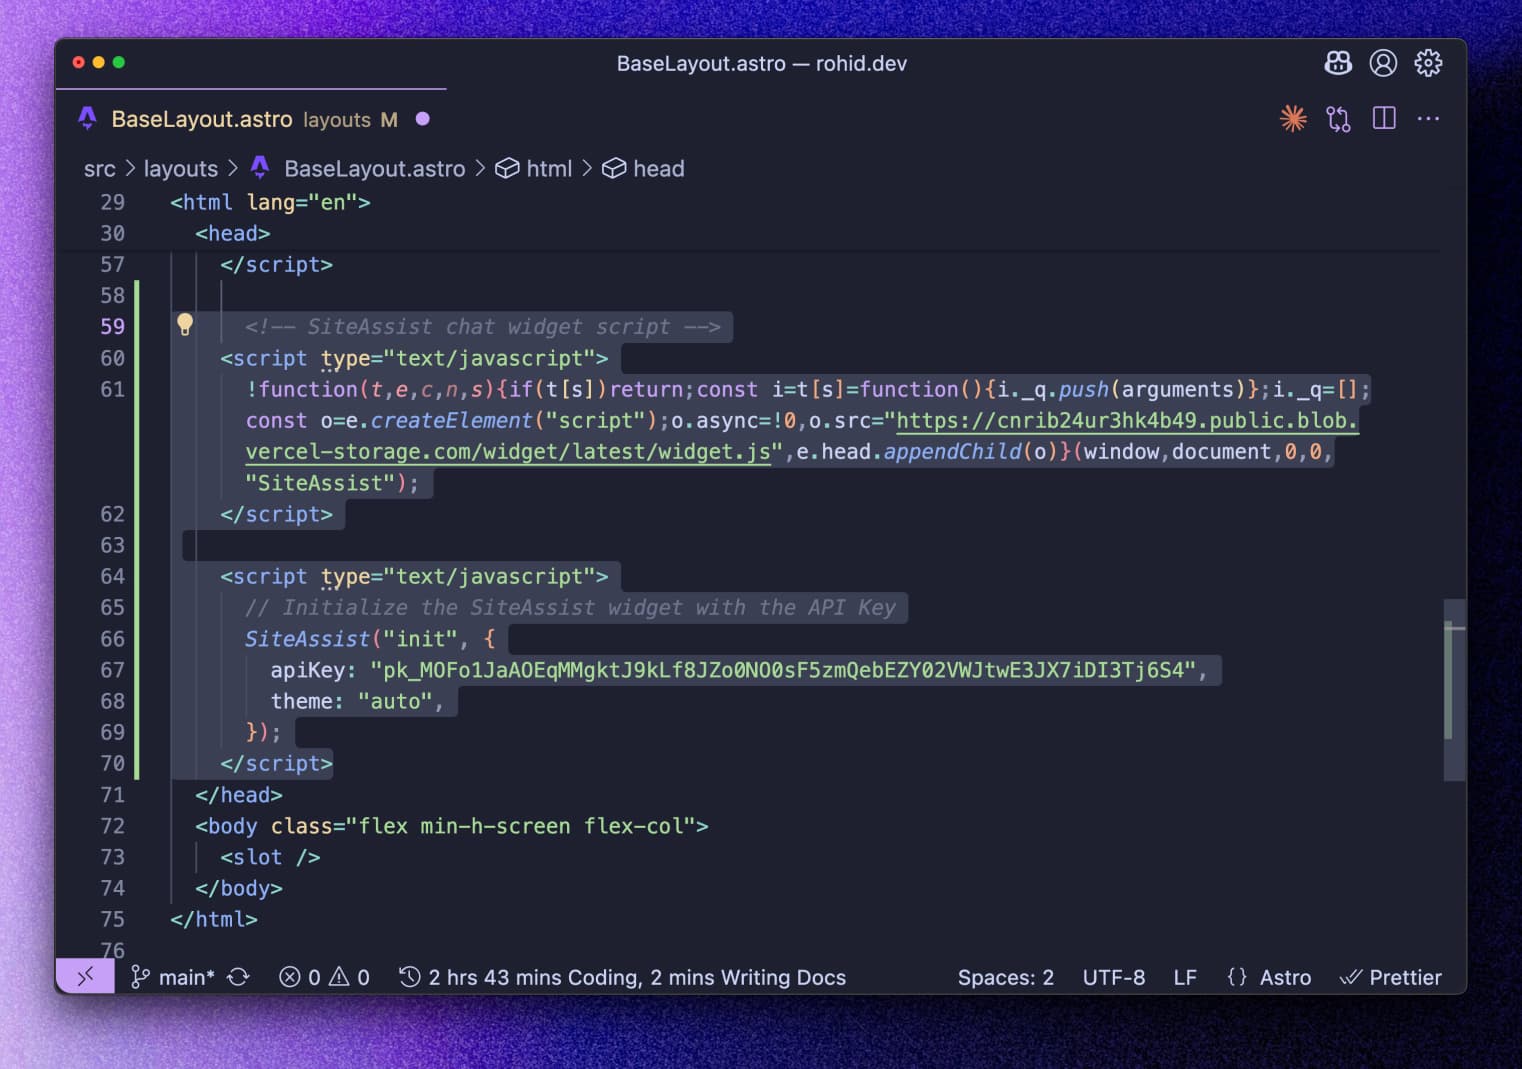
For most users: You'll need to add a small piece of code to your website. Here are the most common ways:
WordPress Users:
- Go to Appearance → Theme Editor → header.php
- Paste the code before the
</head>tag
Shopify Users:
- Go to Online Store → Themes → Actions → Edit Code
- Open theme.liquid and paste before
</head>
Squarespace Users:
- Go to Settings → Advanced → Code Injection
- Paste the code in the "Header" section
Other Website Builders:
- Look for "Custom Code," "HTML/CSS," or "Header Code" sections
- Contact your web developer if you need help

Save and publish your website.
Need help? If you're not sure how to add code to your website, email us at support@siteassist.io - we're happy to walk you through it!
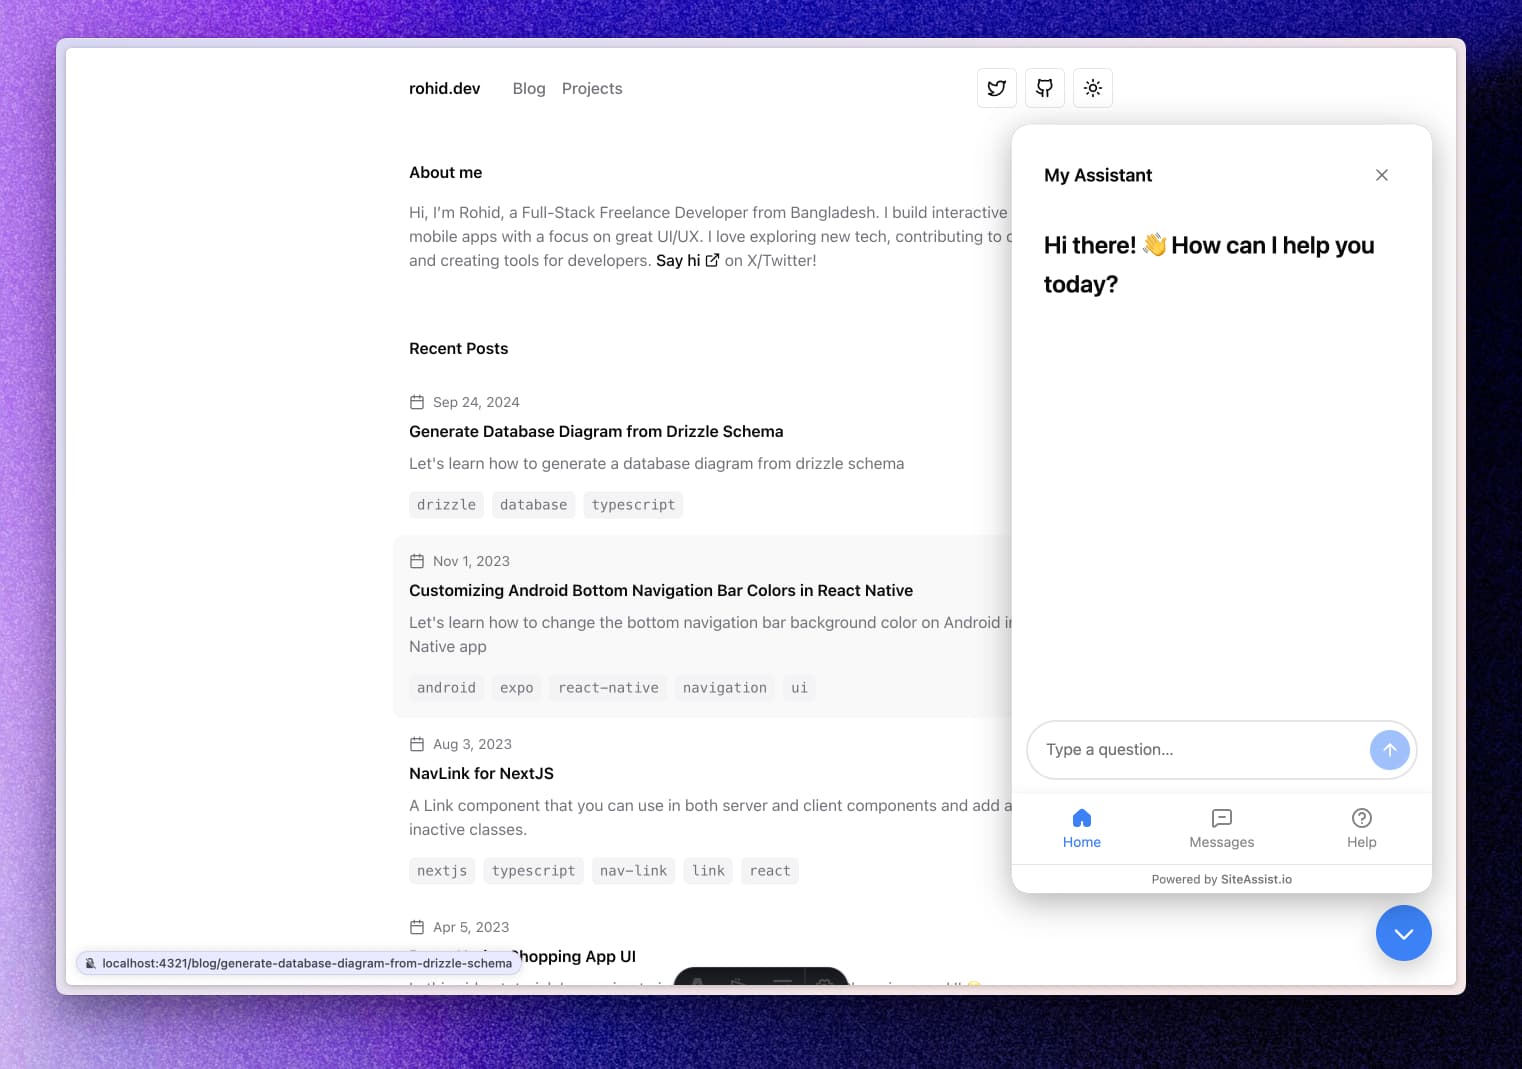
🎉 Congratulations! Your AI-powered assistant is now live on your website!
You'll know it's working when you see:
- A small chat bubble in the bottom right corner of your website

- Visitors can click it to start chatting with your AI assistant
- The assistant will answer questions based on your website content

Pro tip: Test it yourself! Visit your website and try asking your assistant a question about your business. It should respond with helpful information from your site.
What's Next?
This quick start guide covered the basics to get your assistant up and running. SiteAssist offers much more:
- Advanced customization - Personalize your assistant's behavior, appearance, and responses
- Multiple AI models - Choose from OpenAI, Anthropic Claude, Google Gemini, and xAI Grok
- Analytics & insights - Track conversations, user behavior, and performance metrics
- API integration - Build custom integrations and workflows
- Team collaboration - Manage multiple projects and team members
- Enterprise features - Advanced security, SSO, and custom deployments
Explore our comprehensive documentation to unlock the full potential of SiteAssist.
Need Help?
We're here to help you succeed! Whether you have questions, need assistance with setup, or want to discuss advanced use cases, our team is ready to provide personalized support.
Contact us: support@siteassist.io
We'd love to hear about your use case and help you get the most out of SiteAssist!